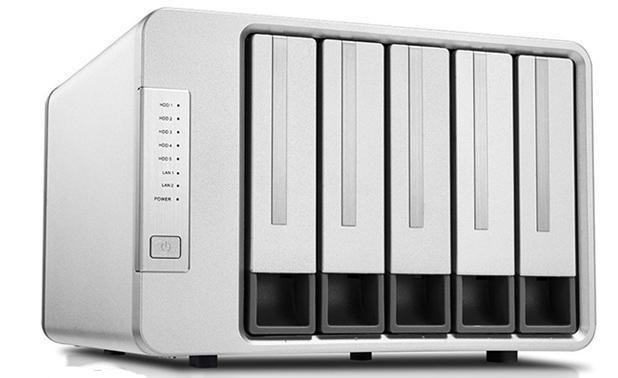
My brother owns a TerraMaster F5-420 which is a nice little device considering its price value. Unfortunately his actions led to an unwanted situation.He exposed the web GUI out to the world and in came a surprise: xmrig
Oddly enough this was supposed to be fixed on version 3.0.34 as stated here. We were running version 3.1.03! Upon a bit more further analysis, the file “/usr/www/include/ajax/GetTest.php” in fact didn’t exist, suggesting another *.php file had a similar vulnerability? Or, GetTest.php had been deleted by the person/script which injected the xmring binary? I didn’t get into a deeper analysis of how this all occurred as he wanted his NAS to go back online ASAP.
Why? Isn’t TOS Good Enough?
Among many things, TOS isn’t secure especially if security vulnerabilities of low level complexions exist. Honestly, it just can’t be trusted. It also lacks a lot of aesthetics and overall poor quality in a user experience perspective. Additionally this presented us with the opportunity to get rid of TOS.
What You’ll Need
- Windows Server 2012 R2 .iso
- Rufus
- USB Drive
- Big enough for ISO to fit in
- Can be USB 3.0
- 2.5″ SDD/HDD
- 15+7 Pin SATA Serial ATA Male to Female Power Cable, 20″
- Picked ours up from a Central Computers
- SKU: CAB-GCST304R
- Double-sided tape
- Zipties
Hardware Configuration
Installing Windows Server 2012 R2
- Burn Windows Server 2012 R2 iso onto your USB drive
- I will not be going over how to burn an iso onto a USB drive as there are many tutorials already out there.
- Plug the USB drive onto the back of the NAS, use the 3.0 port if applicable.
- I don’t recall the need to change anything in the BIOS, although I had been going through it out of my curiosity. The hotkey to boot into the BIOS is the Delete key. Boot menu or to override the prioritization is located in the Save & Exit menu in the BIOS.
- Boot into Windows Server 2012 R2 Installation environment and install it like you would with any other Windows installation.
- Profit.
Updates
- 7/7/2018
- We ditched Windows Server 2012 for Xpenology. Seems like Windows kept maxing out the CPU for long periods of time creating a lot of heat and ultimately forcing the system to halt.


Would you share how you installed Xpenology on the TerraMaster F5-420? What issues you experienced, changes to software needed, and did you install it on the same SSD or the internal USB boot drive ECT.
Regards
Jim
Just an FYI the email address is real, I have my own emailserver.
Hello Jim,
I used the bootloader version and firmware version from this page.
Bootloader: DS3615xs 6.1 Jun’s Mod V1.02-alpha
Firmware: DSM_DS3615xs_15152.pat
No issues to report on, both the bootloader and firmware are rock solid (If you stick with the versions mentioned above). Although I may add, you will lose HDD LED status, and proper full shutdowns (i.e kernel doesn’t tell ACPI to cut power off but nevertheless the processor halts). Also the lack of upgrading is bummer but not an issue. All features offered on he Web GUI work like a charm. We also have it setup as a NVR for our POE cameras, this exceeded our expectations by a 10th fold with all the bells ans whistles it has to offer just from this. No need to change the software, it’s pretty much plug-and-play expect the quirks mentioned above. I installed the bootloader onto the internal USB drive. The SSD is being utilized as a cache to increase read/write speeds. The actual firmware (DSM_DS3615xs_15152.pat) is installed onto your first RAID that you will create in http://find.synology.com (or the actual private IP address i.e. 192.168.X.X, etc)
As far as installing it, I followed this tutorial here. Be sure to pay close attention when editing the pid and vid values of the USB drive in grub.cfg as this will definitely cause a headache if not defined properly.
Let me know if you have any more questions.